Subscribe via RSS
InDesign on Demand: Custom Page Numbering

by Katherine Robinettte, CPSM, Go! Strategies, LLC
Last month, I showed you how to add a tabloid (or other custom size) page to an existing document.
Now you have re-read the RFP, and you see that a 11x17 page counts as 2 pages. So, how do you make your page numbering adjust to that? How can you show that pages 4 AND 5 are on that 11x17 front? And pages 6 AND 7 are on the back? And then have the pages number normally again?
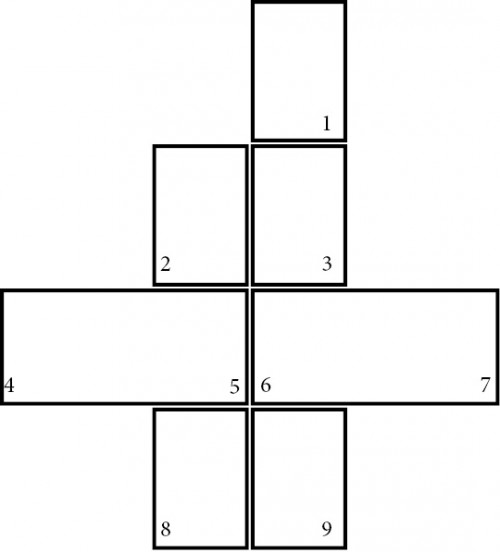
To set up automatic page numbering, normally you go to your Master Pages and add the auto-numbering feature there. For example, I've added it to my A-Master page design here, both on the left and right side pages. I put the left side in Red and the right side in Blue, just to tell them apart for this article.

Now, when I go back to my normal pages, the page number is there.

For the tabloid Master Pages, set up you footer in the same way, with the alternating left/right page numbering. You'll notice that for the first part of the left-side page, it works:
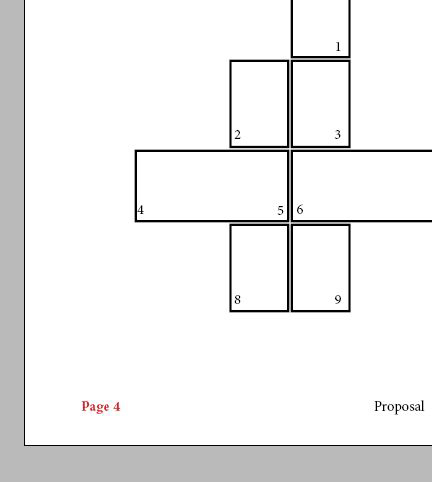
To do the remaining numbers, you have a 2-step process.
1) Set up a Numbered List
2) Set up a numbered Paragraph Style
First, let's set up a Numbered List. The Numbered List feature in InDesign will allow you to have sequential numbers across text frames that are not linked together.
1. Go to Type...
2. Bullet & Numbered Lists...
3. And select Define Lists...

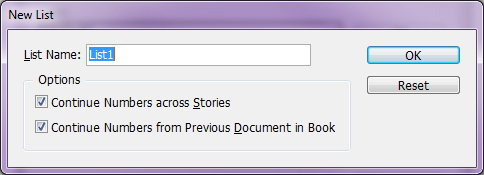
4. Select New... and you will get this dialog box. Create a name for your Numbered Lists so you can find it again, and leave the default boxes checked. You want your numbers in this list to continue from frame to frame (across stories) or from Document to Document within a Book. (If you haven't used a Book in InDesign before, this probably will not apply to you. But it doesn't hurt anything to leave it checked.)
Now set up your number Paragraph Style.
1. Go to Type...
2. Paragraph Styles... [you can probably also hit F11 to shortcut to this]
3. New Paragraph Style...
4. Now you will have this dialog box, and you can put your number preferences in here under Bullets and Numbering:
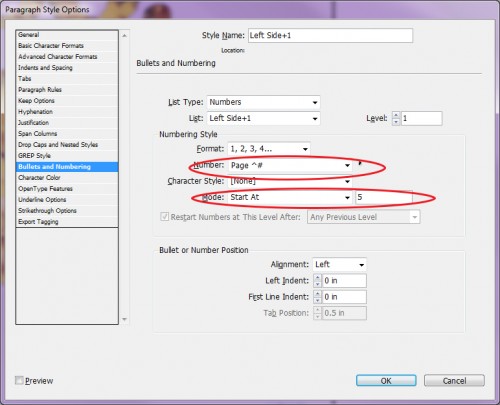
5. You'll notice that I put the word "Page" before the number so this will match my normal footer.
6. I have told the style to start with page 5, since page 4 numbered correctly in my document. You would start with whichever page number you need first.
7. I have specified this goes with the Numbered List I created in the first step, Lest Side+1. I named my paragraph style the same name.
Putting It All Together
Now, go back to the actual page where you want the double page numbers to begin. This is NOT the Master Page. This is the actual document page.
1. Insert a blank text frame where you want your new Page Number to be. (I've condensed my footer area for the purposes of this example."

2. Select the text box so it is highlighted, and go to Type... Bulleted & Numbered Lists... and select Apply Numbers.
3. Now type a space in the empty text frame. You have to have SOMETHING in the frame for your numbered list to appear.

4. Draw a new Text Frame on the next page, select Type... Bulleted & Numbered Lists... Continue Numbering... And add a space in the frame.

Getting Back to Normal
So, now you are ready to go back to the normal 8.5x11 pages and the auto-numbered pages. But, of course, the pagination is off! You want it to start at page 8, but it reads page 6.

1. Click anywhere in the text on the page.
2. Go to Layout... Numbering & Section Options...
3. In this dialog box, select "Start Section" and give it the new starting page number (in this case, 8).
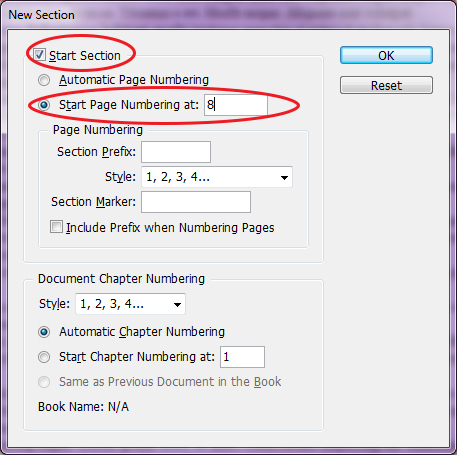
Now all of the auto-numbering from this point forward will be correct: